
Product: SDP
Author: Pranoti Kotangale
Need
Semarchy Data Platform (SDP) and the new Design XP (DXP) store data product designs as files in an external version control system. To move from manual deployments to a governed, repeatable delivery process, teams need to automatically build and deploy their data models to an SDP environment each time changes are merged.
This article explains how to prepare an SDP environment and an Azure Repos repository, and how to create an Azure DevOps CI/CD pipeline that builds a model with the Design CLI (sem-design) and deploys it to a data location.
Summarized Solution
- Prepare the SDP environment: create a datasource and a technical client (client ID and client secret) with the DM Admin role for deployments.
- Prepare Azure Repos: create an Azure DevOps project, generate a Personal Access Token (PAT), and push your design project — including the Design CLI
.tgzpackage — to themainbranch. - Provide an agent to run the pipeline: a Microsoft-hosted agent where possible, or a self-hosted agent.
- Store credentials as secret pipeline variables (
CLIENT_ID,CLIENT_SECRET), never in the YAML file. - Create an
azure-pipelines.ymlfile that installs the Design CLI, builds the model, and deploys it to the target data location on every commit tomain.
Detailed Solution
1. Prerequisites
- An Azure DevOps account with permission to create projects, pipelines, and agent pools.
- Administrator access to the target SDP environment.
- A Design XP project (data model source files) and the Design CLI package (
sem-design.tgz).
2. Prepare the SDP Environment
2.1 Create a datasource
Create the datasource that the data location will use. See Create or update a datasource in the SDP API reference.
2.2 Create a technical client for the pipeline
- Go to Platform Administration > Clients.

- Click + to create a new client for deployments.
- Grant the client the DM Admin role, which is required to deploy data models. If you also want to use these credentials for platform maintenance and monitoring operations, grant the Platform Admin role as well.
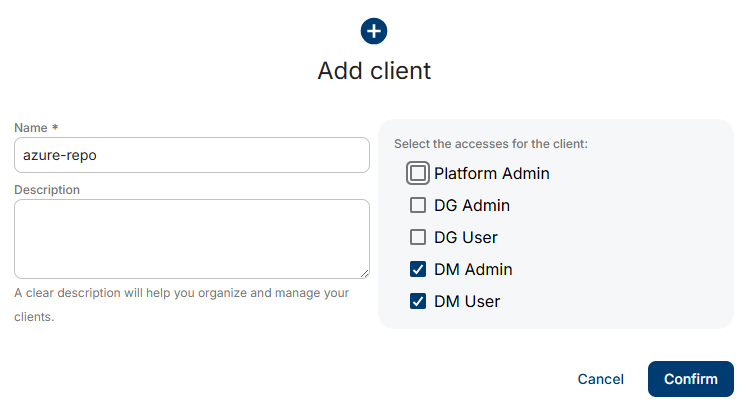
- Copy the client ID and client secret. You will add them to the pipeline in step 4.2.
Note: the client secret gives deployment access to your environment. Store it only in a secret manager or as a secret pipeline variable, and grant the minimum role your pipeline needs;
3. Prepare Azure Repos
3.1 Create an Azure DevOps project
Log in to Azure DevOps and create a new project. Once it is created, you land on the Project Summary page, with access to Repos, Pipelines, and the other services.
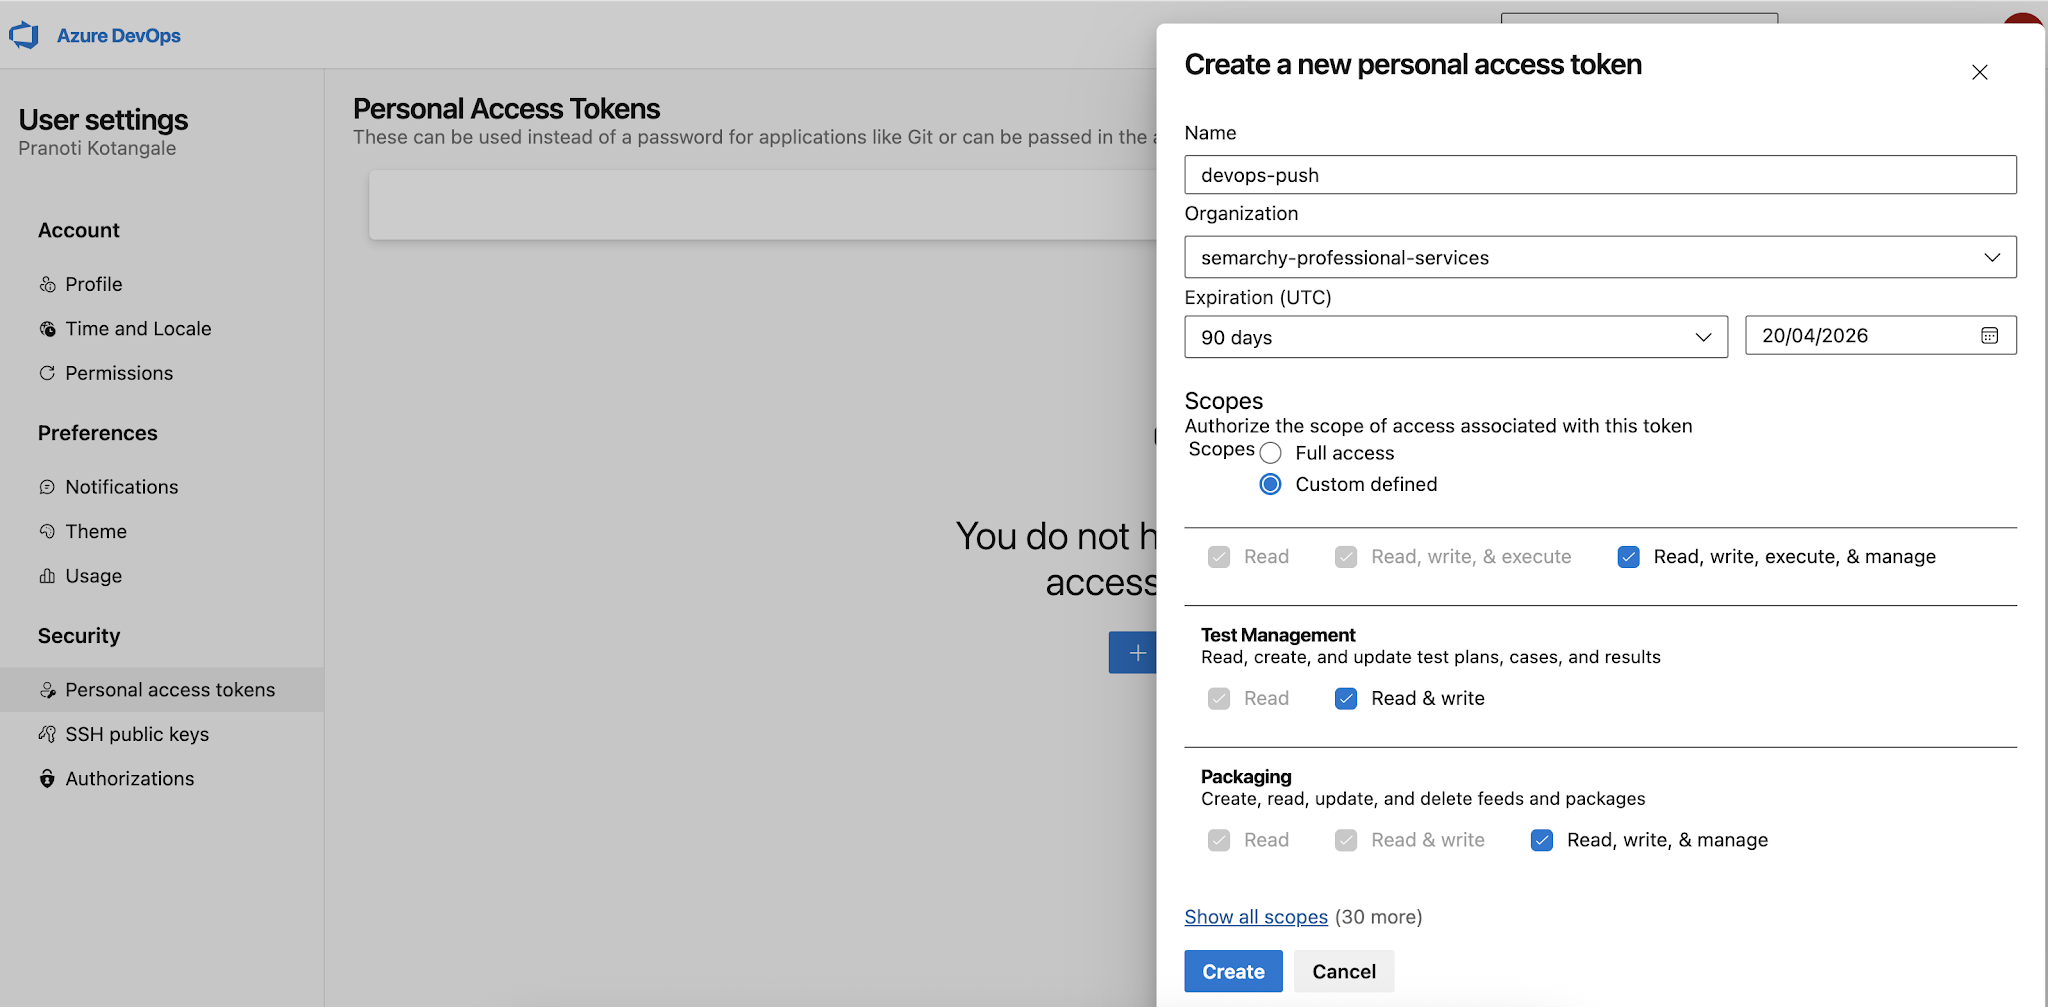
3.2 Create a Personal Access Token (PAT)
In your Azure DevOps organization, click your profile icon (top-right) > Personal access tokens, and create a new token with the Code scope set to Read & write. Save the token: it is shown only once.
3.3 Initialize and push the repository
From the root folder of your design project, run the following commands. Make sure the Design CLI .tgz file is part of the repository (the sample pipeline expects it at resources/sem-design.tgz).
# Initialize a new Git repositorygit init # Add all files to be trackedgit add . # Create the initial commitgit commit -m "Initial commit - add project files" # Make sure the branch is named maingit branch -M main # Add the Azure DevOpsremote git remote add origin <YOUR_REMOTE_URL> # Push main to Azure Repos and set the upstream branchgit push -u origin main
When prompted for a password, enter your Azure DevOps PAT.
4. Create the CI/CD Pipeline
4.1 Provide an agent to run the pipeline
Use a Microsoft-hosted agent where possible. If your SDP environment is only reachable from your network, or your organization requires it, use a self-hosted agent:
- Go to Organization settings > Agent pools, open the Default pool, and download the agent for your operating system (Windows, macOS, or Linux).
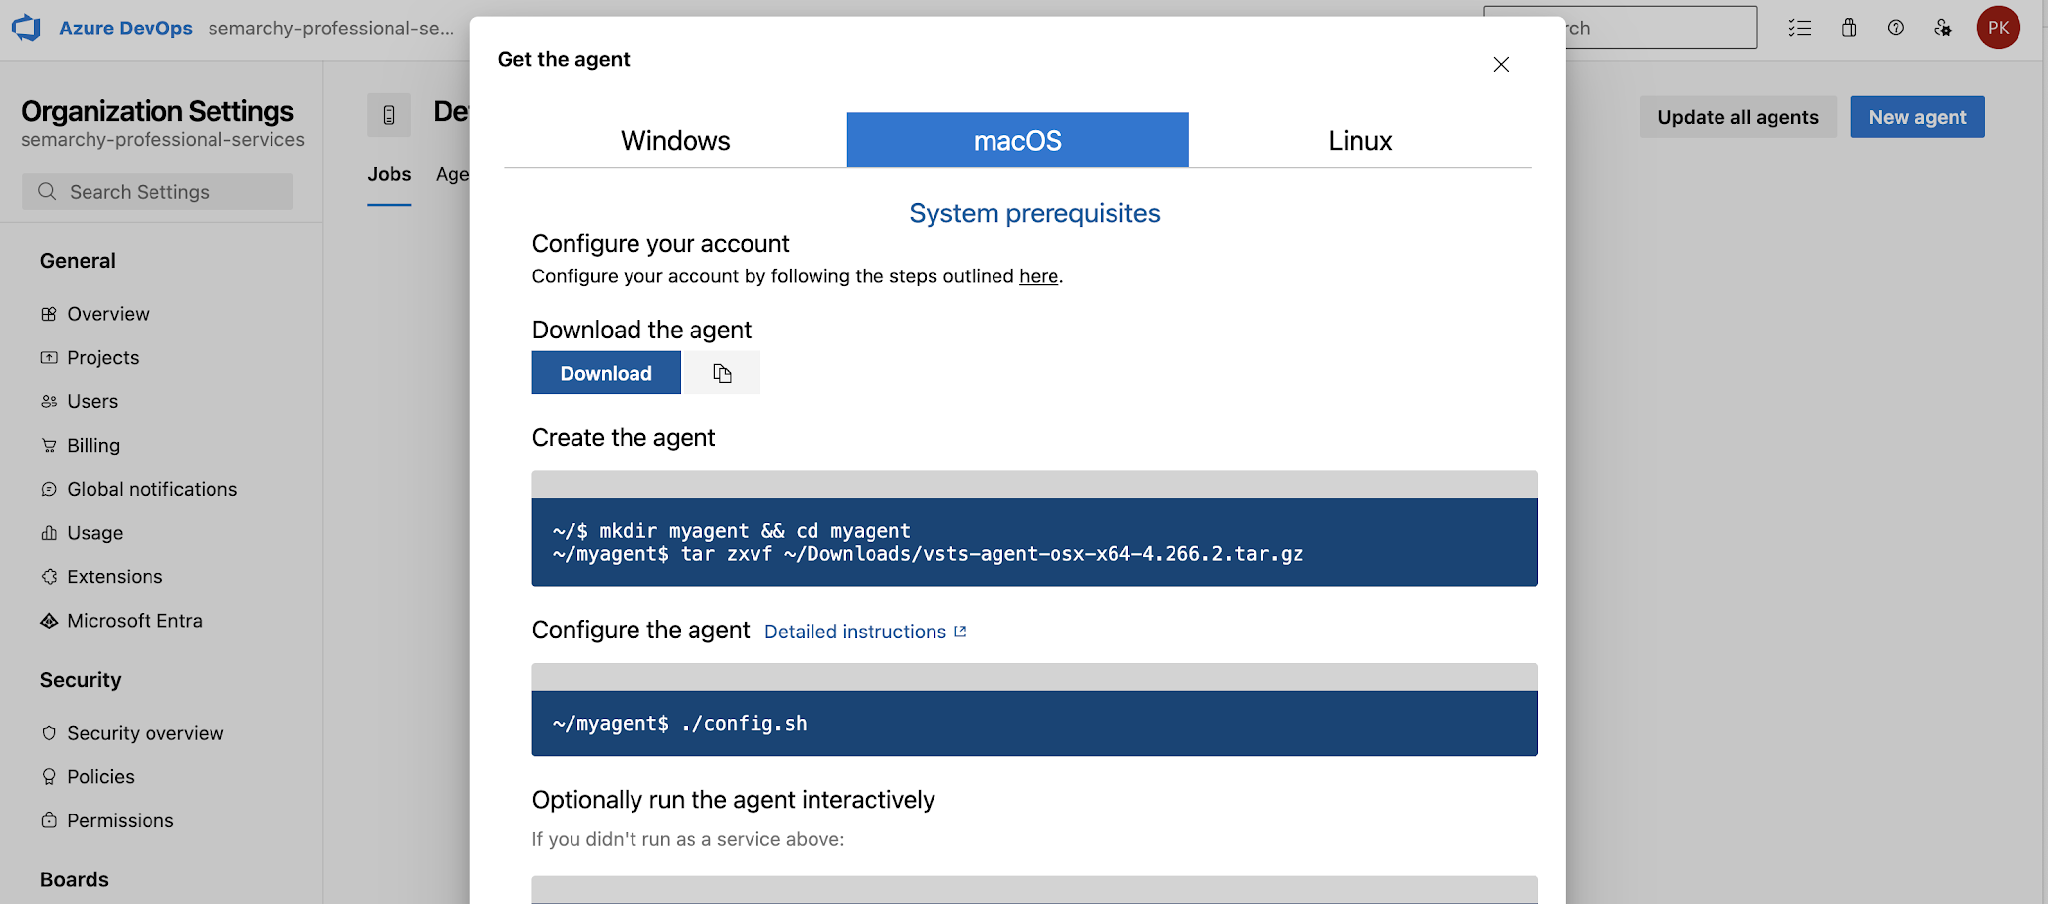
- Configure the agent (
./config.shon macOS/Linux,config.cmdon Windows). Provide your Azure DevOps server URL, choose PAT as the authentication type, and select the Default agent pool. - Start the agent (
./run.shon macOS/Linux,run.cmdon Windows). - Check that the agent shows as Online in Organization settings > Agent pools > Default.
Note: if you use a Microsoft-hosted agent, replace pool: name: Default in the YAML below with pool: vmImage: 'ubuntu-latest'.
4.2 Configure pipeline secrets
In Pipelines > (your pipeline) > Edit > Variables, add the following variables and select Keep this value secret for each:
CLIENT_ID: the SDP client ID created in step 2.2.CLIENT_SECRET: the SDP client secret created in step 2.2.
4.3 Create the pipeline YAML
Create an azure-pipelines.yml file at the root of the repository.
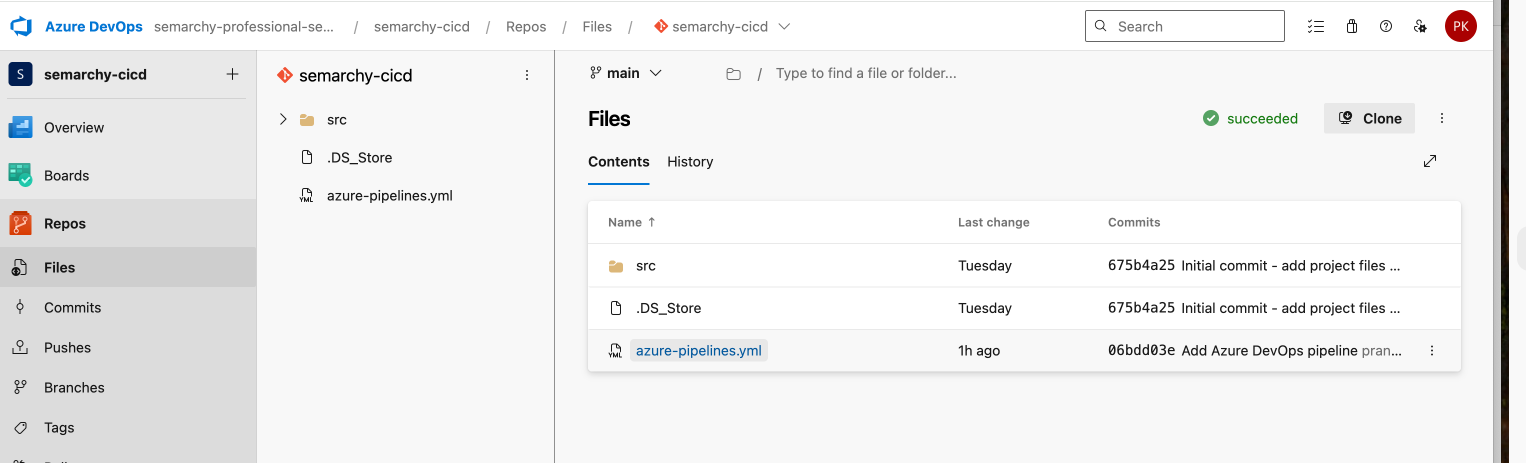
The sample below automatically builds the model and deploys it to a Test data location every time changes are committed to main. Adapt the variables (datasource, data location, instance URL, source folder) and the stages to your needs.
# azure-pipelines.yml
name: semarchy-cicd-$(Date:yyyyMMdd)$(Rev:.r)

trigger:
  branches:
    include:
      - main

pr: none

pool:
  name: Default   # self-hosted agent pool


variables:
  NODE_VERSION: '20.x'
  ROOT_FOLDER: 'src'
  DATASOURCE: 'datasource19'
  DATA_LOCATION: 'customerb2c_test'
  INSTANCE_URL: 'https://test.eu.semarchy.net/dm'


stages:
  - stage: Build_and_Deploy_Test
    displayName: 'Build model and deploy to Test'
    jobs:
      - deployment: DeployToTest
        displayName: 'Deploy -> Test'
        environment: 'Test'
        strategy:
          runOnce:
            deploy:
              steps:
                - checkout: self
                  displayName: 'Checkout repository'


                - task: NodeTool@0
                  displayName: 'Use Node $(NODE_VERSION)'
                  inputs:
                    versionSpec: '$(NODE_VERSION)'


                - script: |

                    echo "Installing sem-design..."
                    npm install -g resources/sem-design.tgz
                  displayName: 'Install sem-design'


                - script: |
                    set -e
                    echo "Building Semarchy model from $(ROOT_FOLDER)..."
                    sem-design dm model build --root-folder "$(ROOT_FOLDER)"
                  displayName: 'Build Semarchy model'


                - script: |
                    set -e
                    echo "Deploying to Semarchy Test..."
                    sem-design dm data-location deploy \
                      --data-source "$(DATASOURCE)" \
                      --data-location "$(DATA_LOCATION)" \
                      --instance-url "$(INSTANCE_URL)" \
                      --client-id "$(CLIENT_ID)" \
                      --client-secret "$(CLIENT_SECRET)" \
                      --root-folder "$(ROOT_FOLDER)"
                  displayName: 'Deploy to Semarchy Test'
                  env:
                    CLIENT_ID: $(CLIENT_ID)
                    CLIENT_SECRET: $(CLIENT_SECRET)
The pipeline performs the following steps:
- Checkout: retrieves the repository content.
- Use Node: installs the Node.js version required by the Design CLI.
- Install sem-design: installs the Design CLI from the
.tgzfile stored in the repository. - Build Semarchy model: validates and builds the model from the source folder.
- Deploy to Semarchy Test: deploys the built model to the target data location using the secret client credentials.
4.4 Create and run the pipeline
- Go to Pipelines > New pipeline.
- Select Azure Repos Git, choose your repository, then select Existing Azure Pipelines YAML file and pick
azure-pipelines.yml. - Run the pipeline. On the first run, Azure DevOps asks you to approve access to the Test environment (and to the agent pool, if applicable).
Once the run succeeds, all tasks show as completed.
5. Best Practices Summary
- ✅ Store the client ID and client secret as secret pipeline variables.
- ✅ Use a dedicated technical client with only the roles the pipeline needs (DM Admin for deployment).
- ✅ Keep the Design CLI package versioned in the repository so every run uses the same version.
- ✅ Use Azure DevOps environments and approvals to control deployments, and add a stage per target environment (for example Test, then Production).
- ✅ Protect the
mainbranch and require a pull request review before merging (see Granular Design Best Practices on SDP). - ❌ Avoid hardcoding credentials in
azure-pipelines.ymlor committing them to the repository. - ❌ Avoid deploying manually to shared environments outside the pipeline.
Following these steps gives your team an automated, traceable path from a commit on main to a deployed data model on SDP.