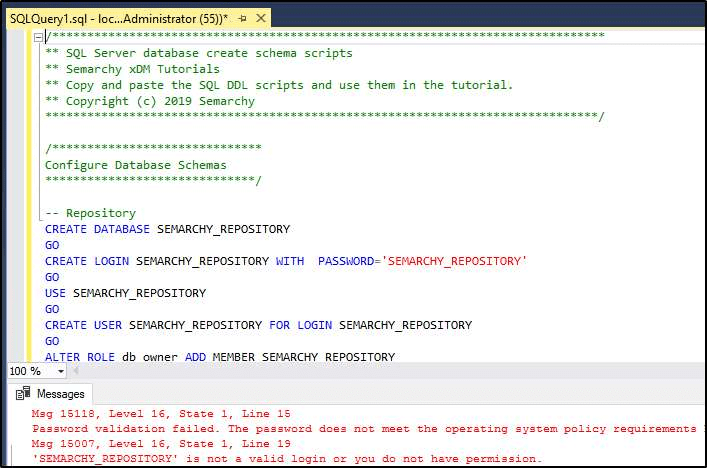
SQL Server users may encounter the following error:
Password validation failed. The password does not meet the operating system policy requirements...'UserX' is not a valid login or you do not have permissions.This article discusses several options to resolve these common errors users may encounter when creating Microsoft SQL Server database objects.
When attempting to execute the database creation scripts, users may encounter an error similar to the one below, indicating the operation failed. This failure results in the databases being created, but login and user object not being created correctly.
To resolve this issue, a user must either
- Change the database login user password in both the SQL script, as well as the Semarchy.xml located in the Catalina directory
- Modify the local security policy which enforces the password complexity requirements (requires elevated permissions)
- Manually create the required databases using SSMS
Changing the database login user password
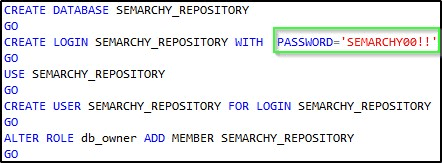
1. This solution is generally the most practical and is the recommended approach. Database permissions are necessary, however, it is not dependent on potential group policies (as the second solution does). In SSMS, locate each reference of “PASSWORD”, and update the existing password to one that meets the complexity requirements. “SEMARCHY00!!” is an example of a password that meets the requirements.
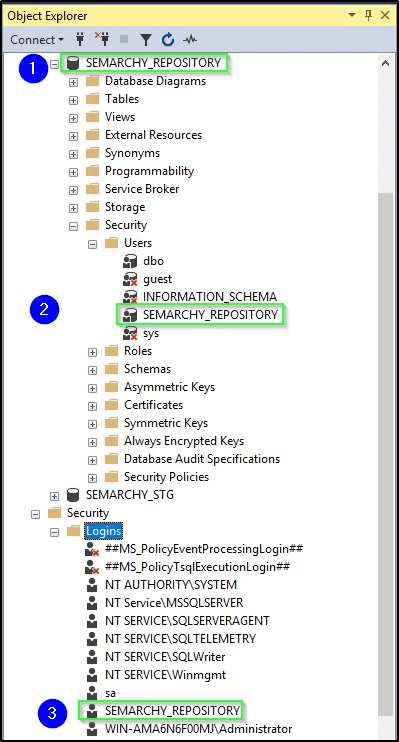
2. After completing updates, drop/delete the existing database objects either by using the provided cleanup script, or by manually deleting the databases and logins through the SSMS UI. After the objects are removed, run the modified script to recreate the objects with the correct configuration. Validate correct installation by verifying the database was created, the user exists in the Security section of the database, and that the login was created in the main (instance- level) Security.
3. Using a text editor like Note++, open semarchy.xml (located here by default: C:\Program Files\Semarchy\mdm-server\conf\Catalina\localhost). Locate and modify each “password” reference, so that the password corresponds to the “PASSWORD” values set in SSMS. Save changes.

Modify the local security policy
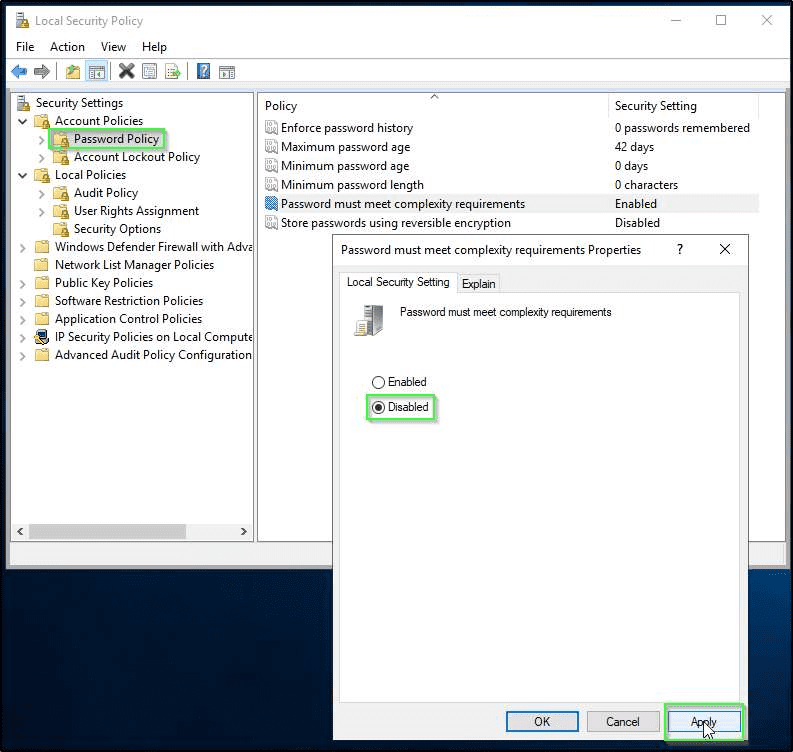
1. This may not be a viable option for all users, as it requires the user to have elevated administrative privileges. Enterprise-level security policies may prevent users from implementing this solution. Navigate to the local security policy (Control Panel > Administrative Tools > Local Security Policy > Security Settings > Account Policies > Password Policy). Select “Disabled”, then “Apply” and “OK”. After completing updates, drop/delete the existing database objects either by using the provided cleanup script, or by manually deleting the databases and logins through the SSMS UI. After the objects are removed, run the modified script to recreate the objects with correct configuration.
2. Validate correct installation by verifying the database was created, the user exists in the Security section of the database, and that the login was created in the main (instance-level) Security.
Manually create the required databases using SSMS
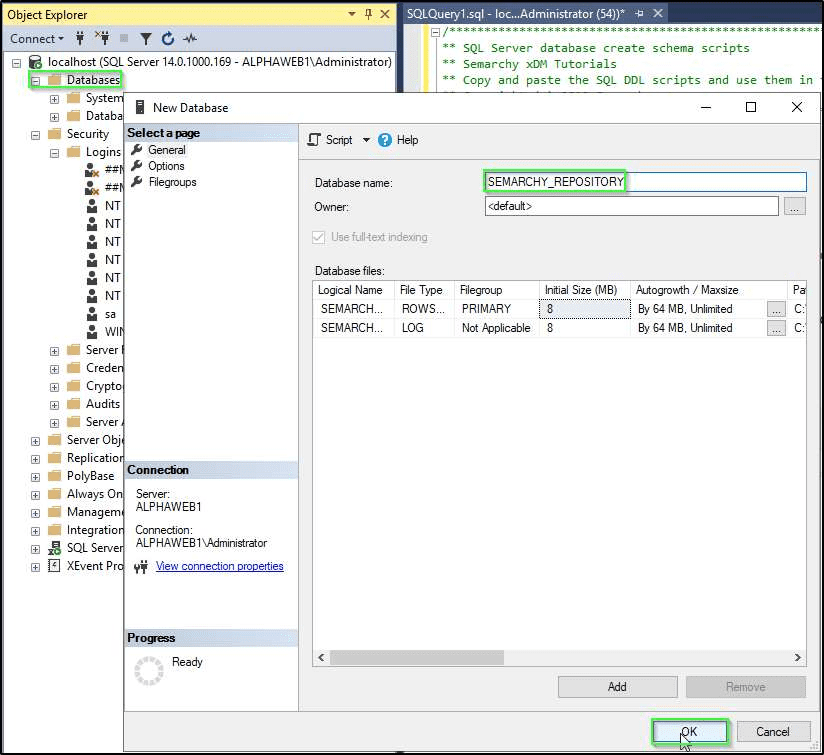
1. Right-click on Databases, enter the database name directly from the script to ensure accuracy, then click “OK”.
2. To manually create the login, right-click on Logins, then populate the “Login name” with the appropriate/corresponding name. Select SQL Server authentication, populate the password fields, then un-check the “Enforce password policy” box. Click “OK” to complete.

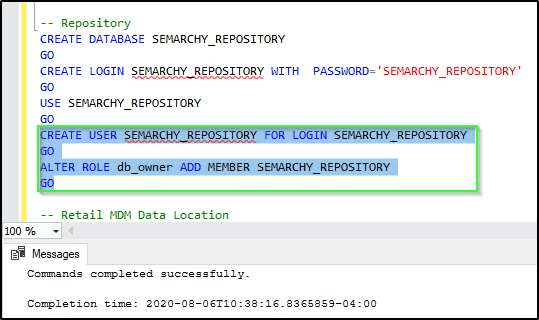
3. After creating the database and login manually, run (only) the highlighted portion of the script (for each database) in order to create the user and database role.
4. Validate correct installation by verifying the database was created, the user exists in the Security section of the database, and that the login was created in the main (instance-level) Security.